Overview
Multi-Factor Authentication (MFA) is one of the simplest and most effective ways to protect your Cloud Command account. It adds a second layer of security by requiring a one-time code from your phone whenever you sign in.
Even if someone gets hold of your password, they still can't access your account without that code. That's why we strongly recommend enabling MFA on every account, whether you're an administrator, a partner managing multiple tenants, or a team member with limited access. Every role benefits from this extra protection.
This guide walks you through enabling MFA from start to finish. It only takes a couple of minutes.
What You'll Need
Before you begin, make sure you have an authenticator app installed on your mobile phone. Cloud Command works with any standard TOTP authenticator, including:
- DUO Mobile Available on iOS and Andriod, We plan to later enable "PUSH" notifications with Cisco DUO
- Google Authenticator Available on iOS and Android
- Microsoft Authenticator Available on iOS and Android
- Authy Available on iOS, Android, and desktop
- 1Password Built-in authenticator for 1Password users
If you don't have one installed yet, download your preferred app from the App Store or Google Play before continuing.
Step 1: Start MFA Setup
There are two ways to begin the MFA setup process.
Option A: From the Dashboard
If MFA is not yet enabled on your account, you'll see a purple banner at the top of your dashboard prompting you to secure your account. Click the Enable MFA Now button to get started.
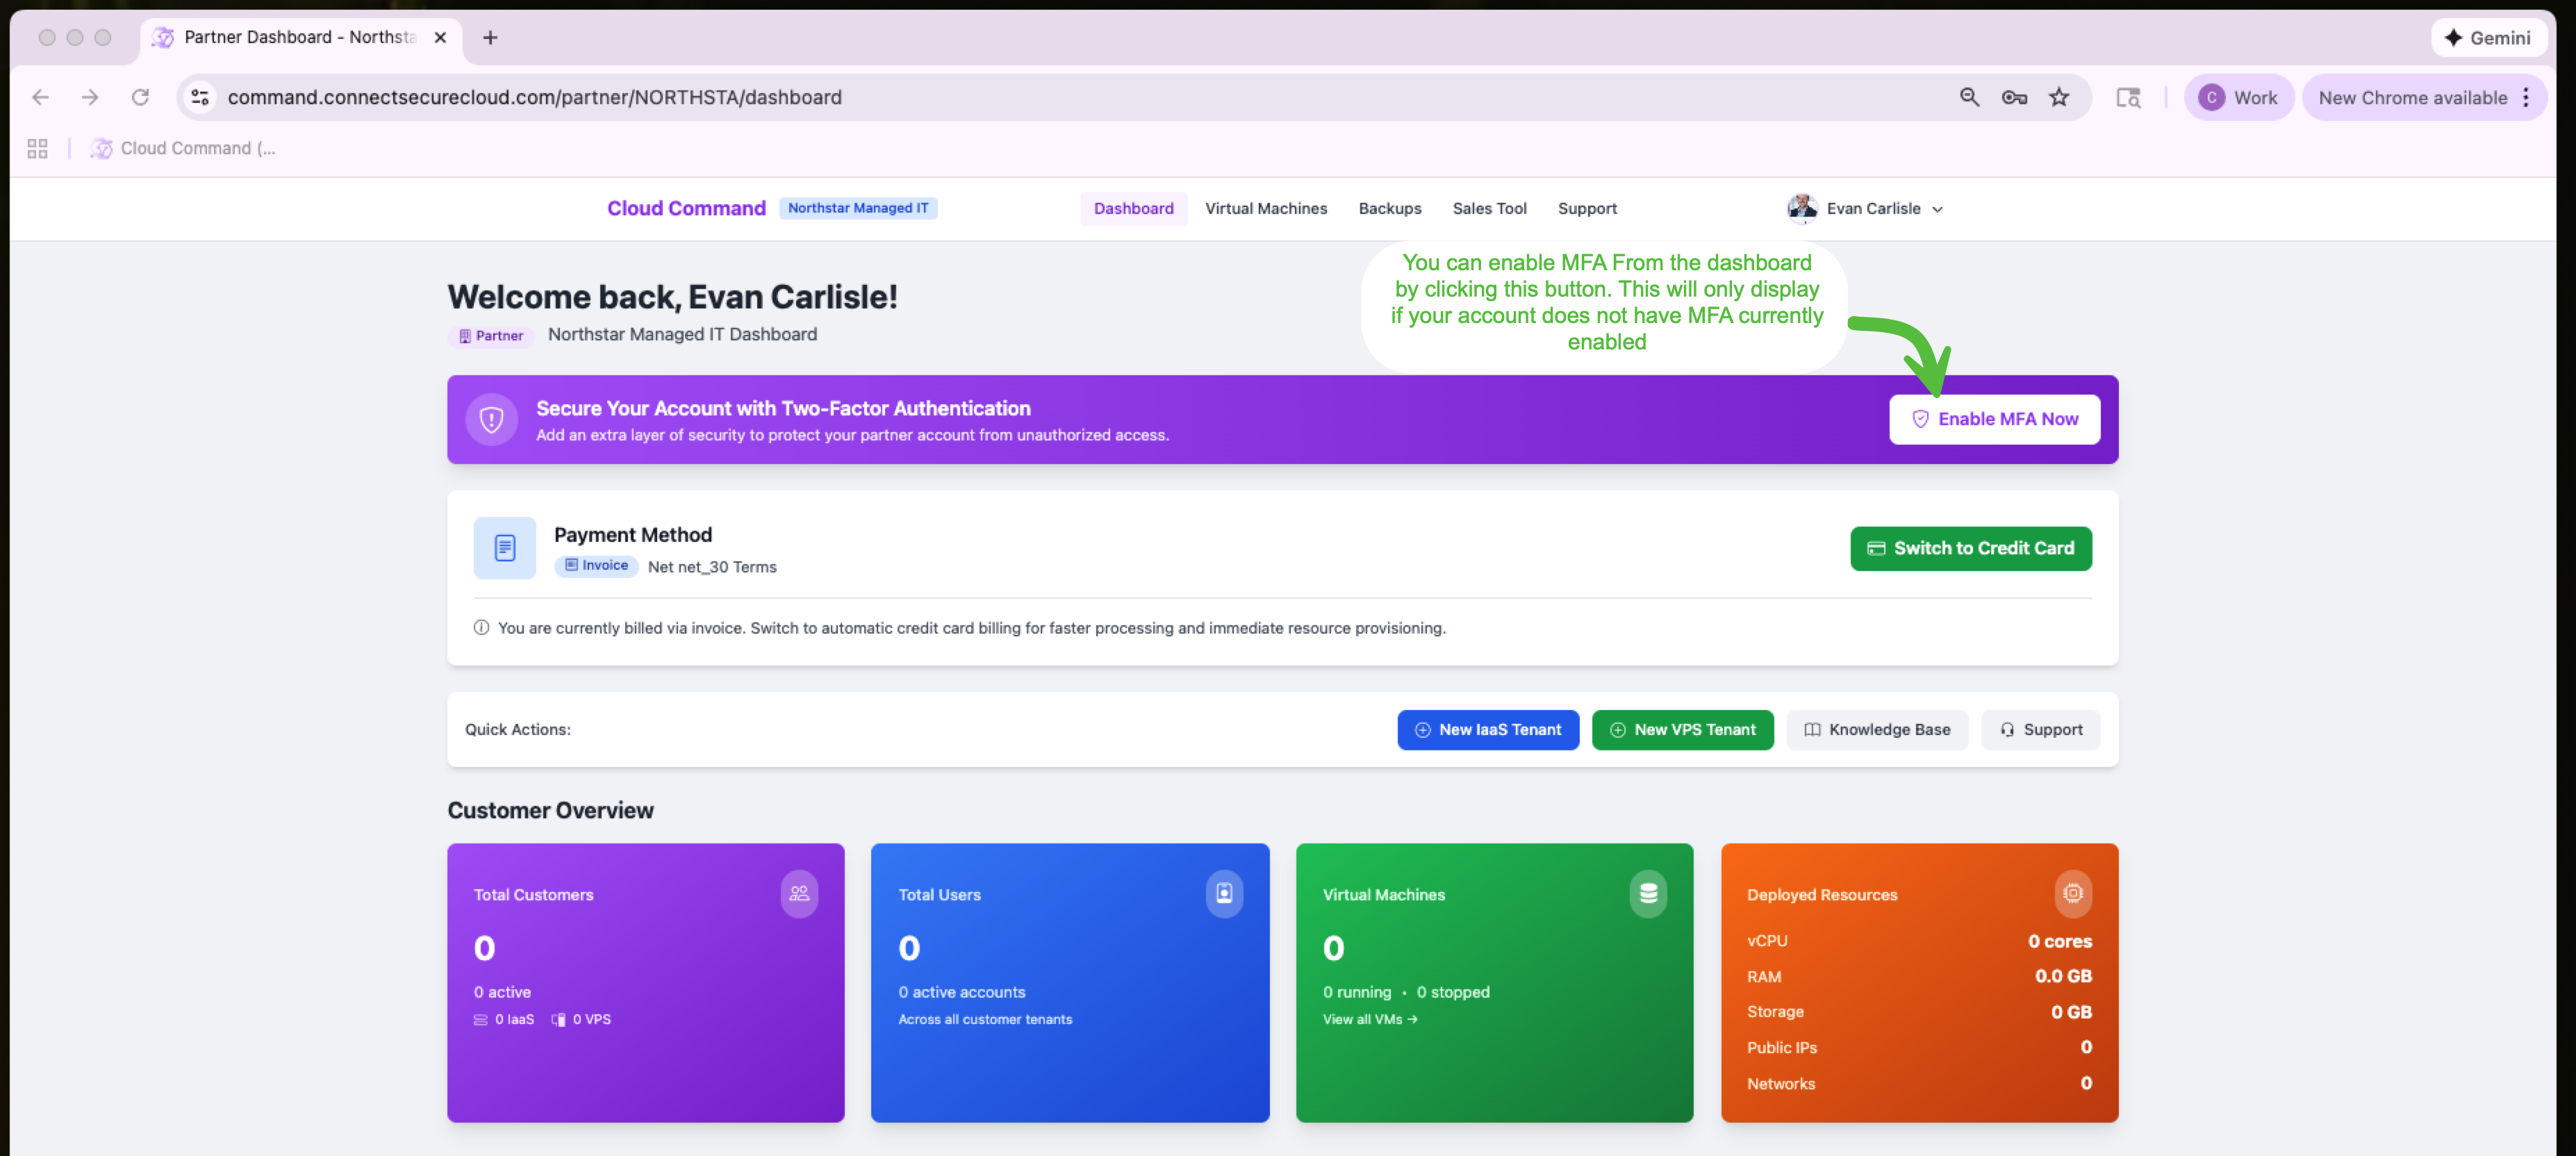
This banner only appears when your account does not have MFA enabled.
Option B: From Account Settings
You can also enable MFA from your Account Settings page at any time. Navigate to your account settings and scroll down to the Two-Factor Authentication section. Click Enable Two-Factor Authentication to begin.
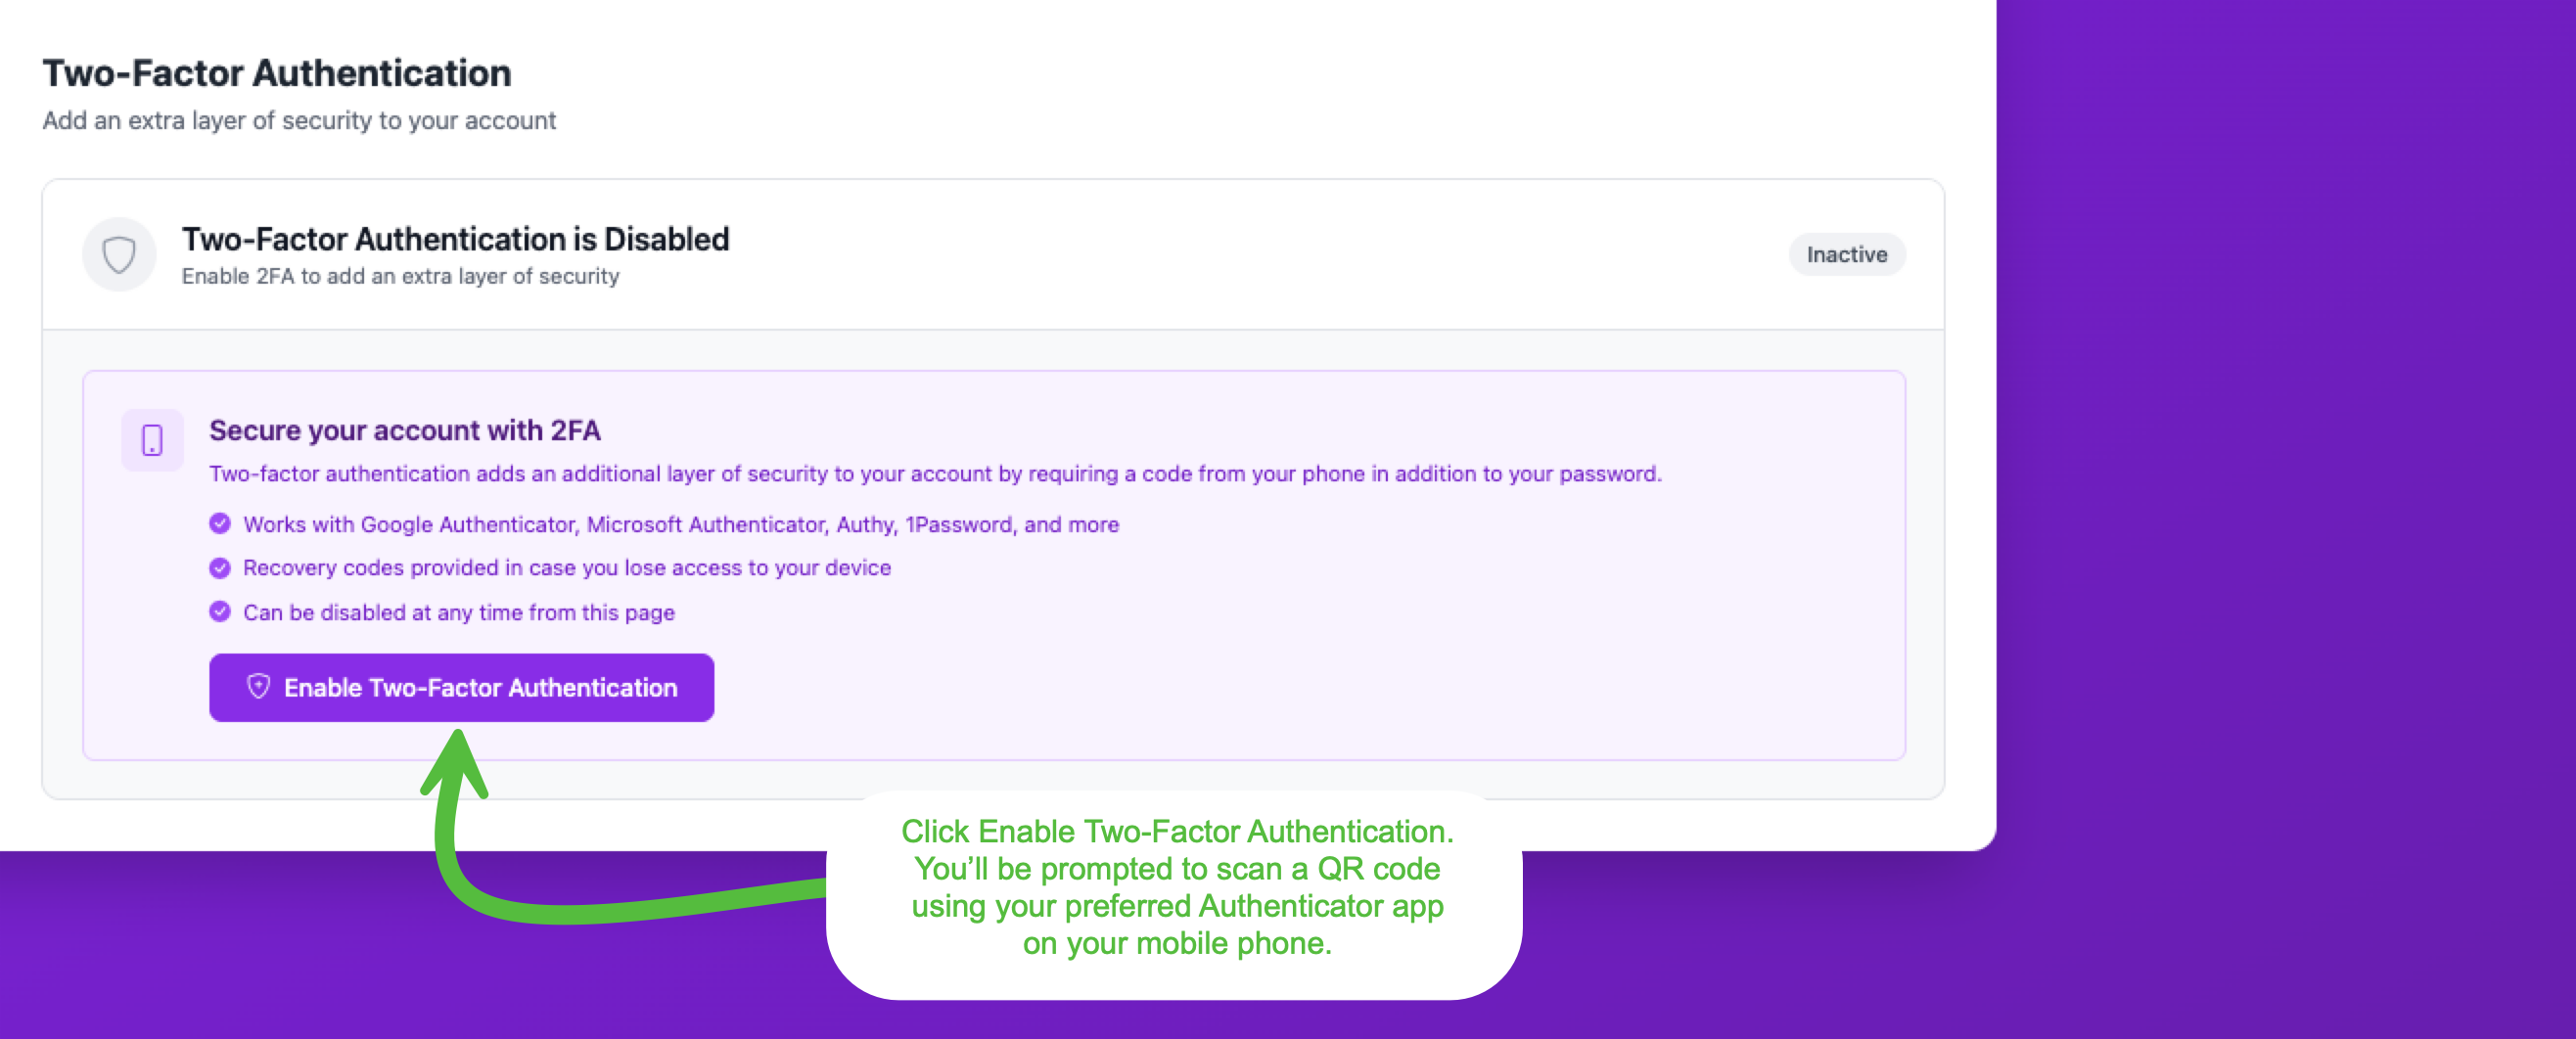
This page also shows you compatible authenticator apps and confirms that recovery codes will be provided.
Step 2: Scan the QR Code
After clicking the enable button, you'll see a setup screen with a QR code. Open your authenticator app on your phone and scan this QR code to add your Cloud Command account.
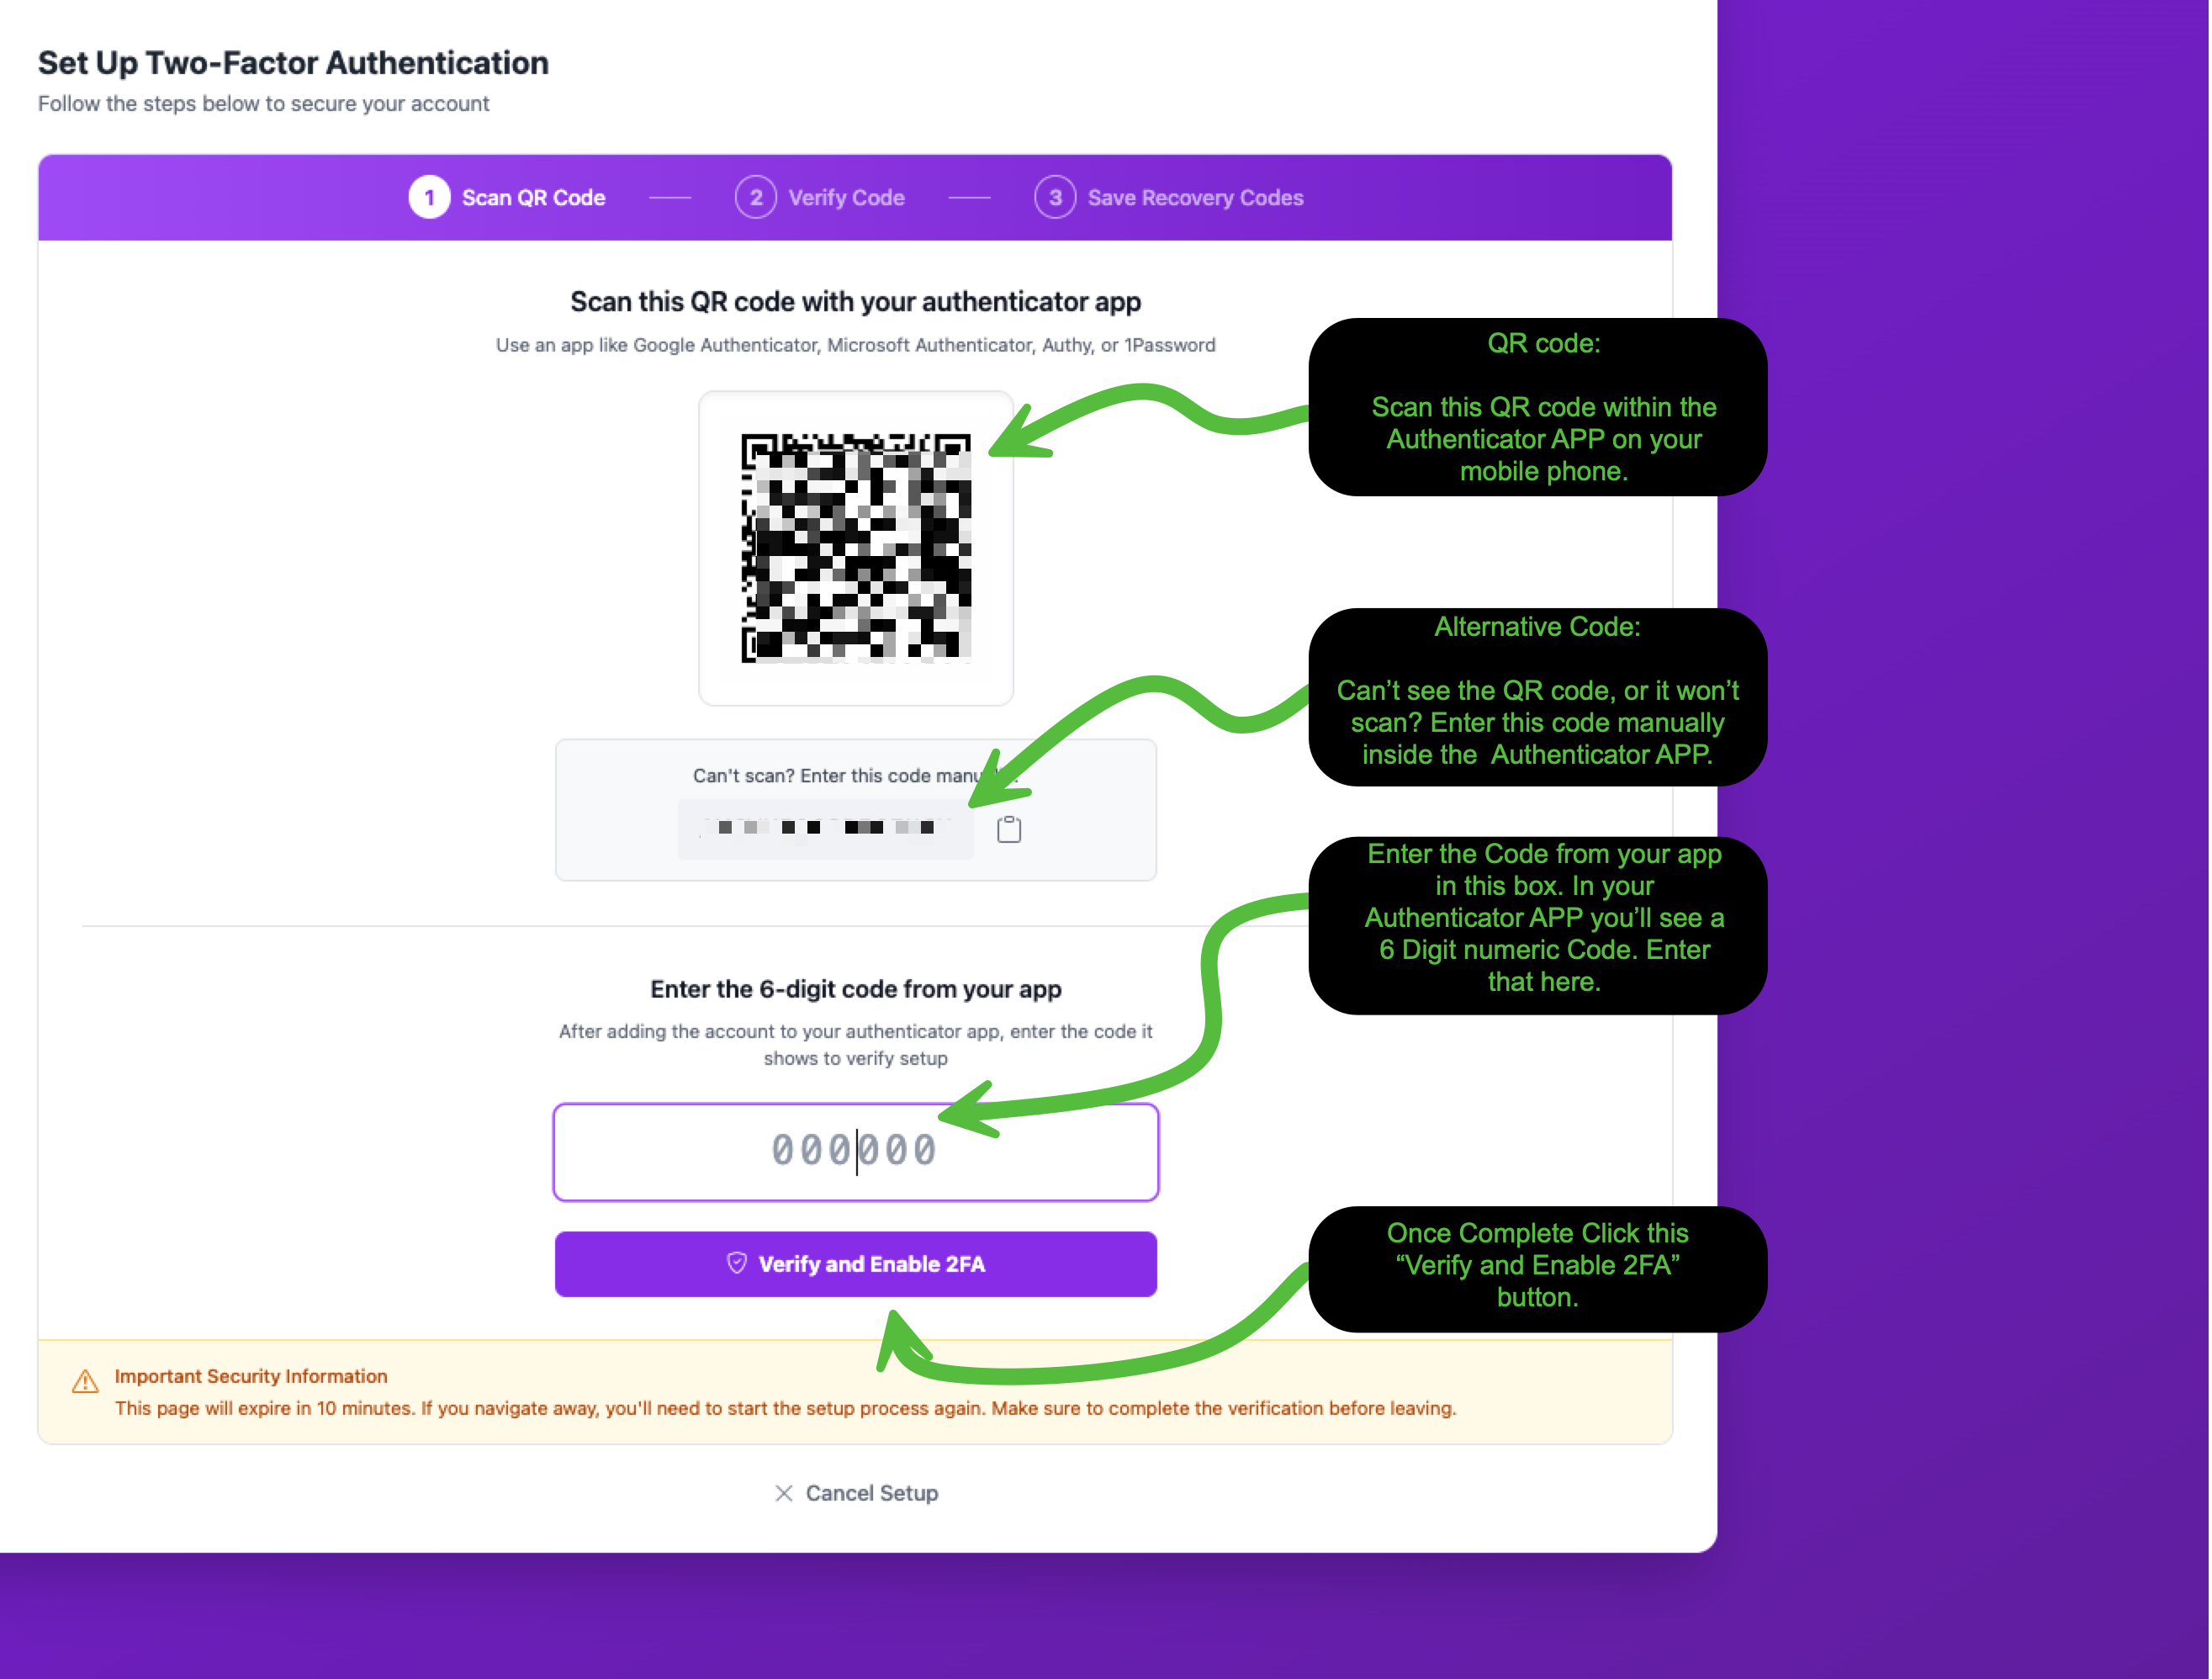
If you can't scan the QR code, there's a manual entry option below it. Click Can't scan? Enter this code manually and type the code into your authenticator app instead.
Once your authenticator app recognizes the account, it will display a 6-digit code that refreshes every 30 seconds. Enter that code in the verification field and click Verify and Enable 2FA.
Step 3: Save Your Recovery Codes
After verifying your code, you'll see a confirmation that Two-Factor Authentication is now active. The next screen presents your recovery codes. This is a critical step.
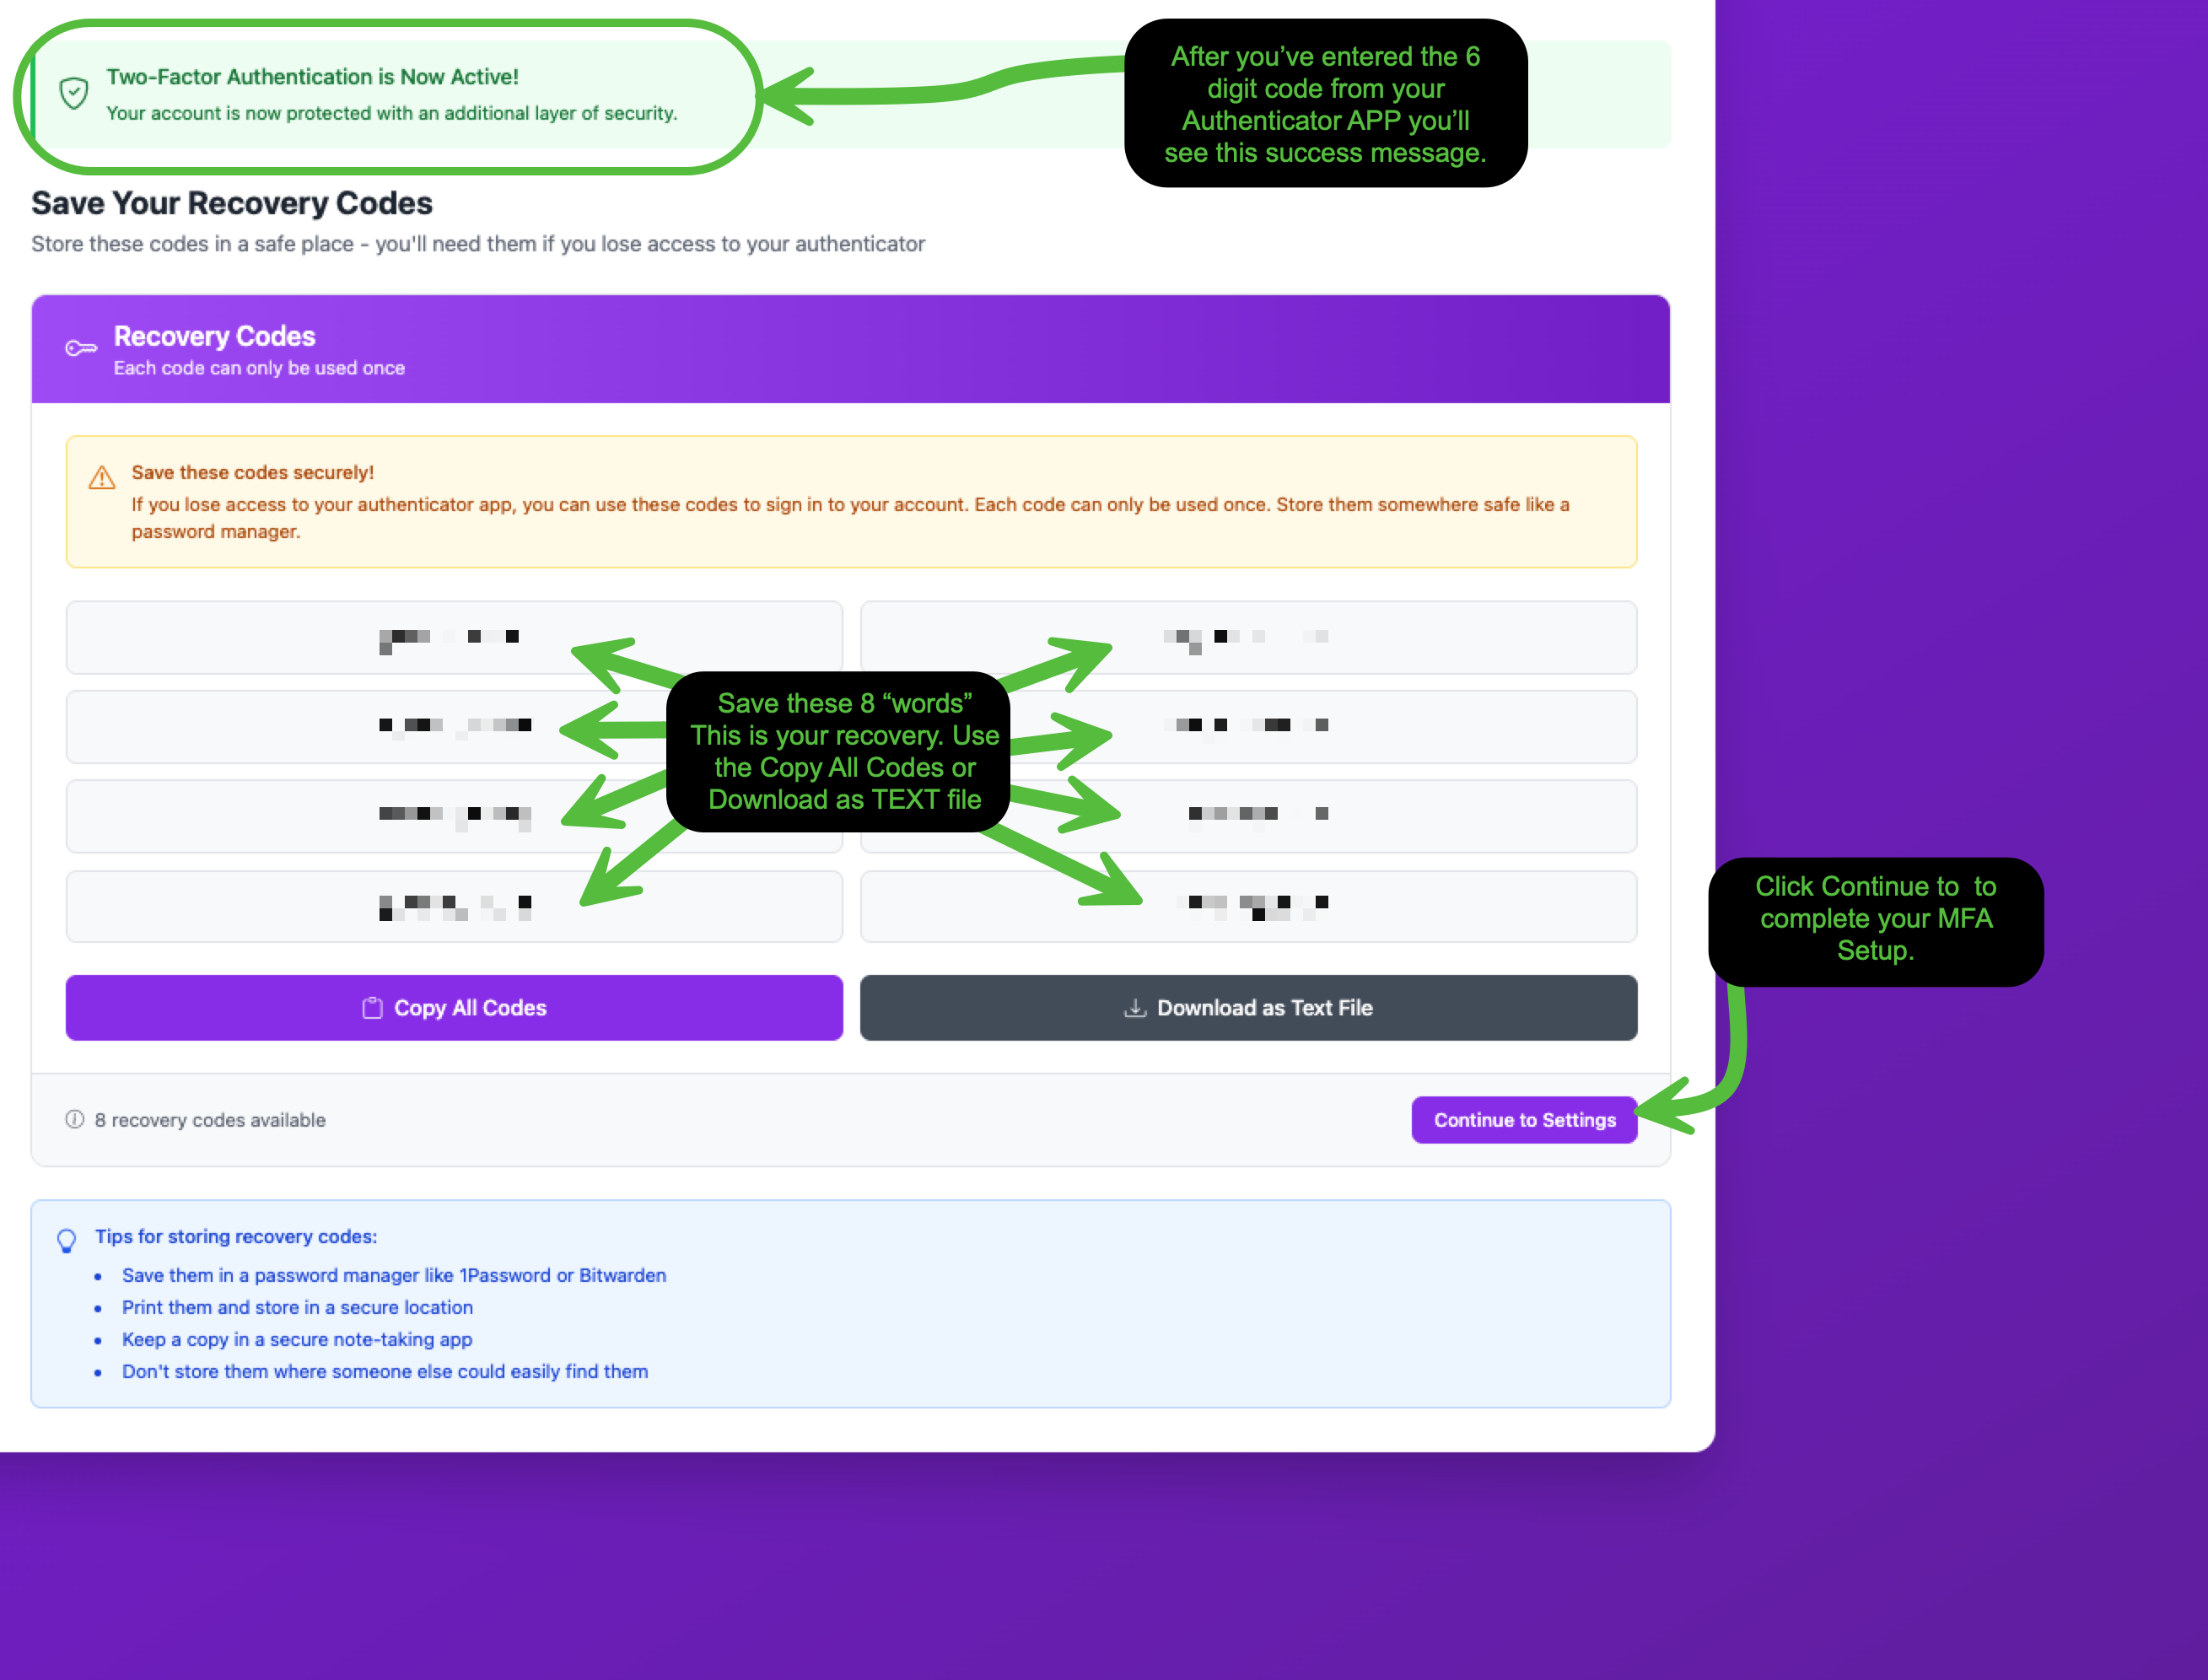
You'll receive 8 recovery codes. Each code can only be used once. These are your backup way into your account if you ever lose access to your authenticator app.
Use the Copy All Codes or Download as Text File buttons to save them. Here are a few tips for storing recovery codes safely:
- Password manager Store them in a password manager like 1Password or Bitwarden
- Print them Print a copy and keep it in a secure location
- Secure notes app Keep a copy in an encrypted note-taking app
- Don't share them Never store codes where someone else could easily find them
Once you've saved your codes, click Continue to Settings to complete the process.
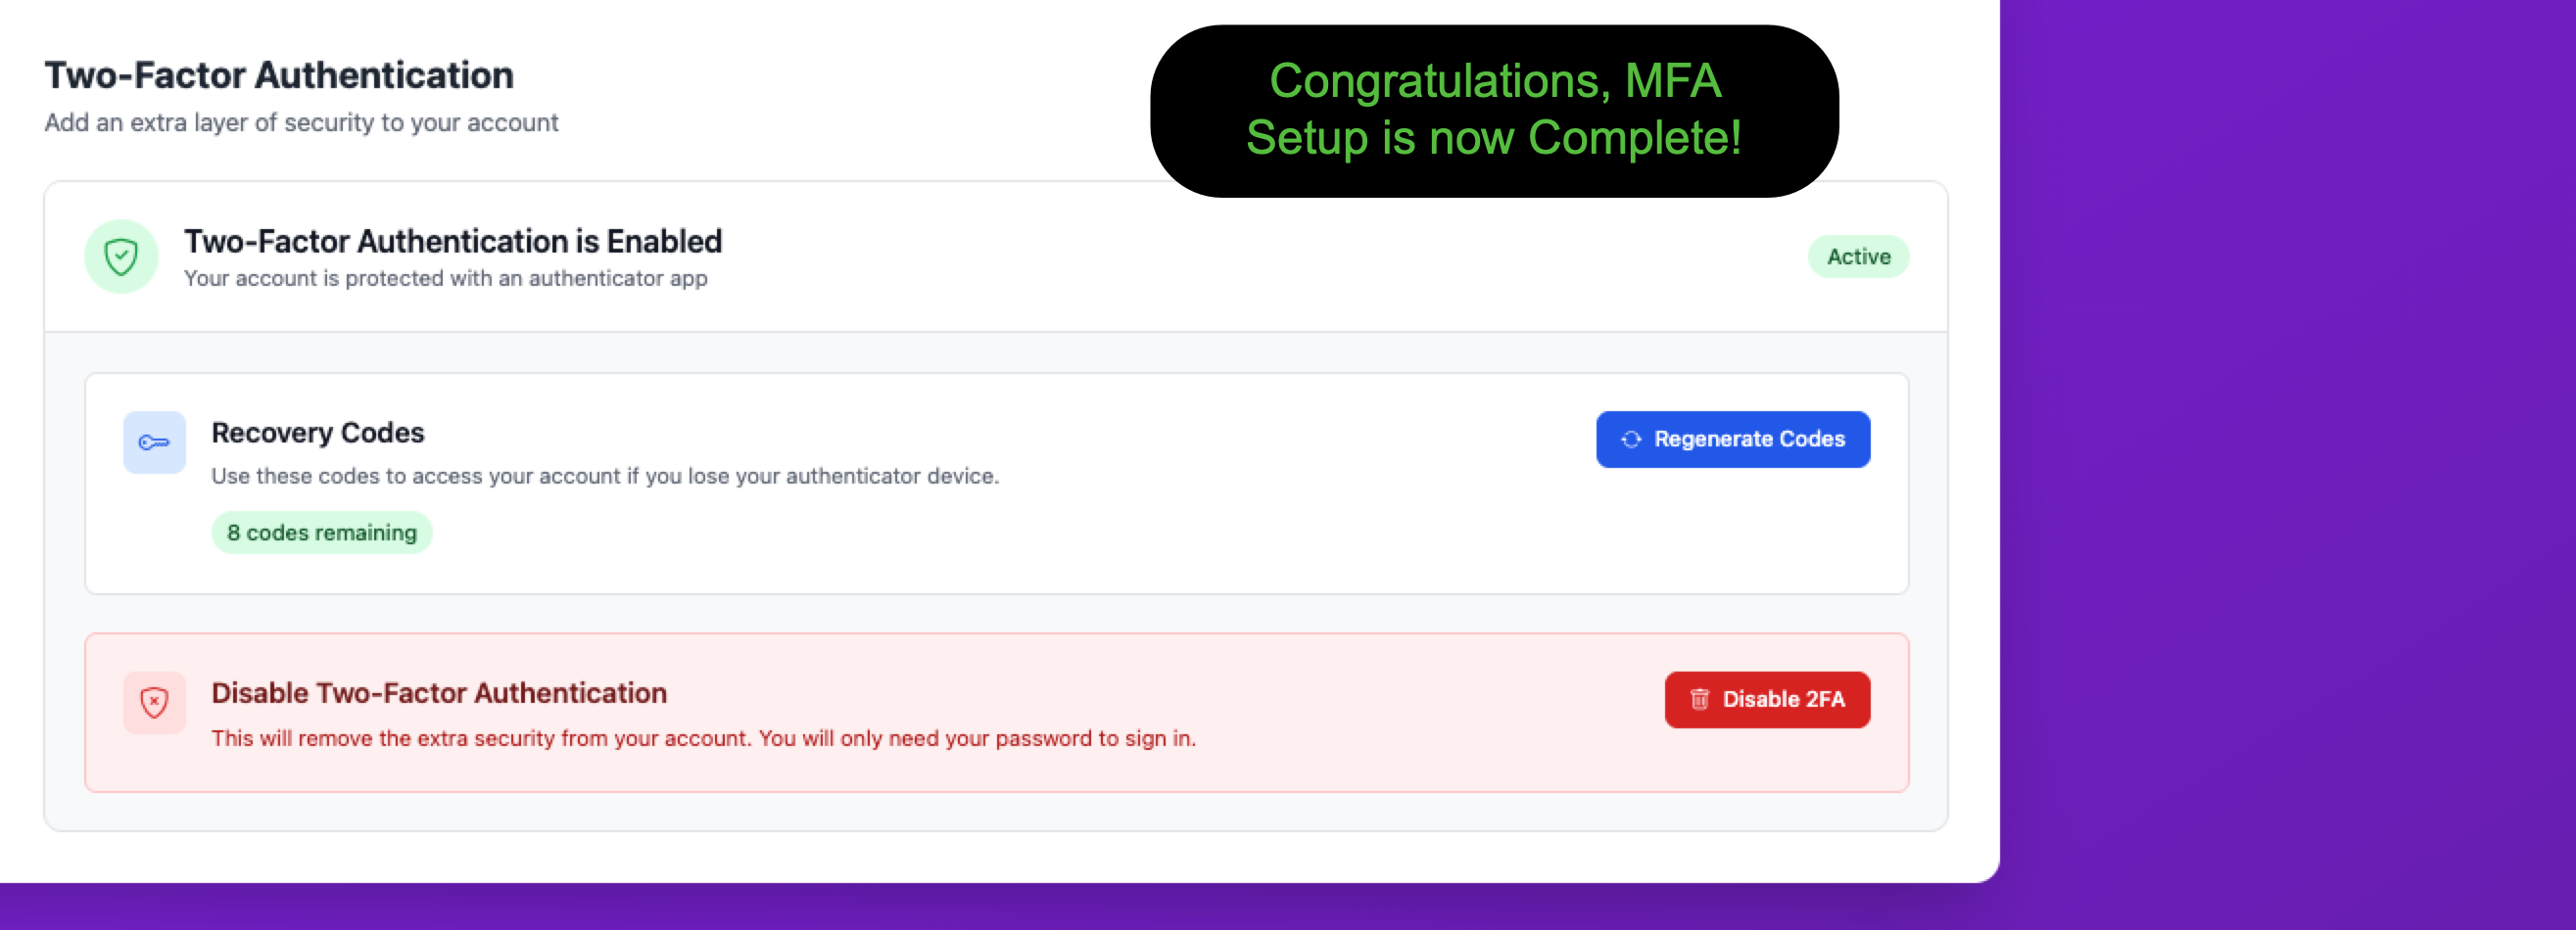
Setup Complete
That's it! Your Two-Factor Authentication settings page will now show that MFA is Active. From here you can regenerate your recovery codes or disable MFA if needed.
Signing In with MFA
The next time you sign into Cloud Command, you'll enter your email and password as usual. After that, you'll see a verification screen asking for your 6-digit authentication code.
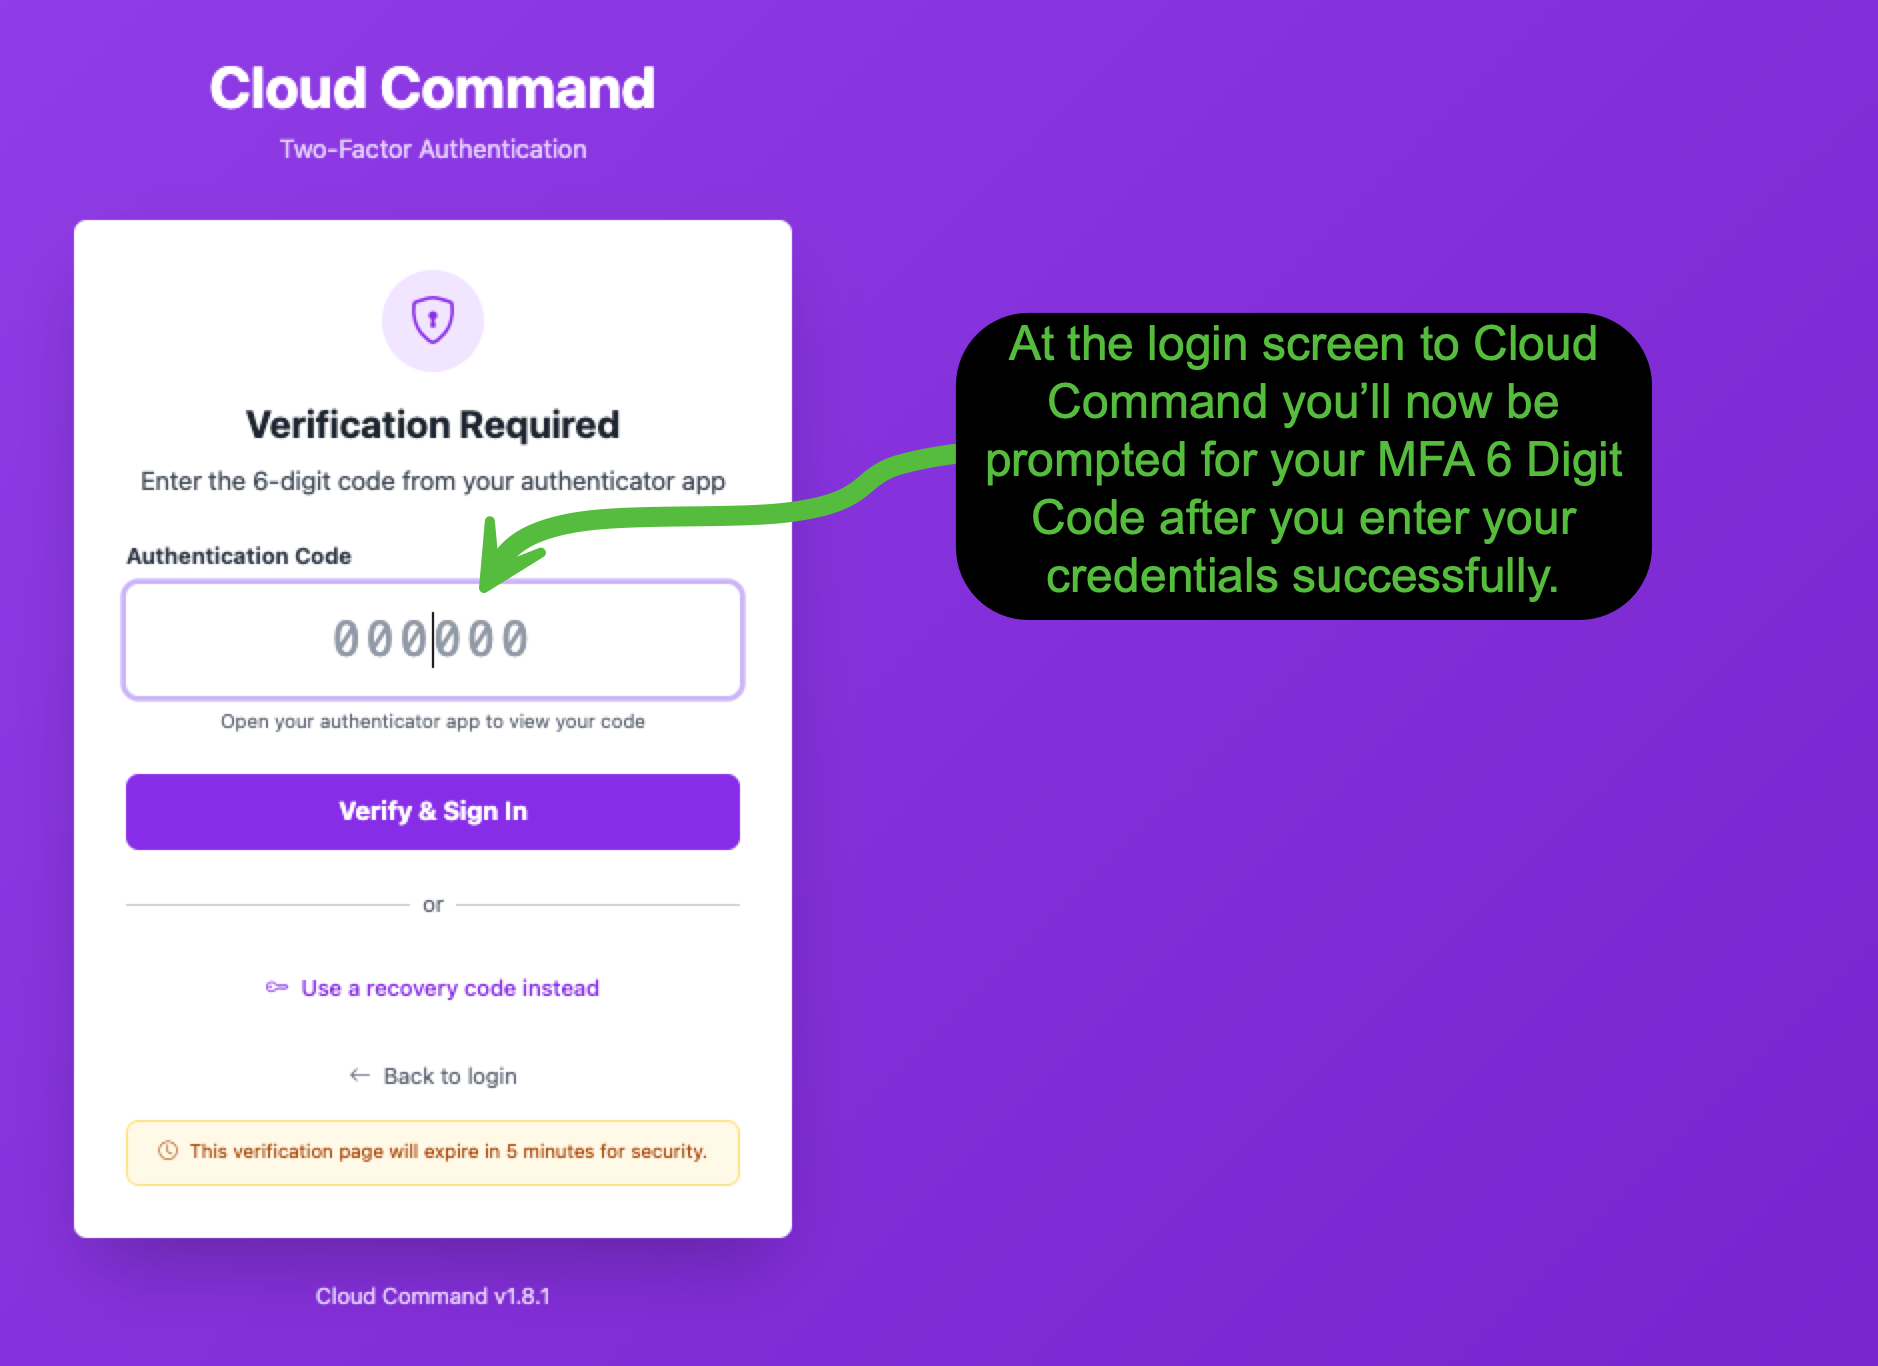
Open your authenticator app, enter the current code, and click Verify & Sign In. If you don't have your authenticator device handy, you can click Use a recovery code instead to sign in with one of your saved recovery codes.
Locked Out or Need a Reset?
If you've lost access to your authenticator app and used all of your recovery codes, don't worry. There are two ways to regain access:
- Ask your administrator. Account administrators can reset MFA for any user from the Manage Users section in Cloud Command. Once reset, you can log in with just your password and set up MFA again.
- Contact Cloudasys. If you don't have an administrator who can help, reach out to our support team and we'll get you back in.
Need Help?
If you have questions about enabling MFA or run into any issues during setup, please submit a support ticket and our team will assist you.