Overview
The Sales & Profitability Tool helps you build quotes for prospective VPS customers, track your sales pipeline, and close deals with a streamlined provisioning workflow. Everything from quoting to customer creation happens in one place.
In this guide, you'll learn how to:
- Create a VPS opportunity with a full profitability breakdown
- Manage your pipeline from the Saved Opportunities dashboard
- Generate a branded PDF quote to share with your customer
- Close a deal as Won and automatically provision the customer account and virtual machine
- Mark a deal as Lost or delete an opportunity you no longer need
Creating a VPS Opportunity
Navigate to the Sales Tool in your partner portal. This is where you'll configure a VPS opportunity for a prospective customer.
Name Your Opportunity
Start by entering a Customer / Opportunity Reference at the top. Use a descriptive name that helps you identify this deal later, such as "Acme Corp. - Web Server" or "Smith LLC - Database."
Configure the Virtual Machine
Next, configure the VM specifications for your customer's needs:
- Service Type Select VPS (or IaaS if applicable)
- Operating System Choose Linux or Windows. This is important because it affects vCPU pricing
- vCPU Use the slider to set the number of virtual CPU cores
- RAM (GB) Set the memory allocation
- NVMe Storage (GB) Set the storage capacity
- Public IPs Choose how many public IP addresses the VPS needs
- Term Select the contract length. Longer terms lower your cost, so a longer commitment means higher profit margins
- Cloud Backup Choose the backup bucket size that fits your customer's retention requirements
Review Your Profitability
As you adjust the configuration, the Profitability Breakdown table updates in real time. It shows your cost, the sale price to your customer, and your profit for each line item. At the bottom, you'll see your Monthly Total for cost, sale price, and profit along with your margin percentage.
Below the table, the summary bar shows three key numbers: Your Cost, Sale Price, and Monthly Profit. The Term Profit shows your total expected profit across the full contract term.
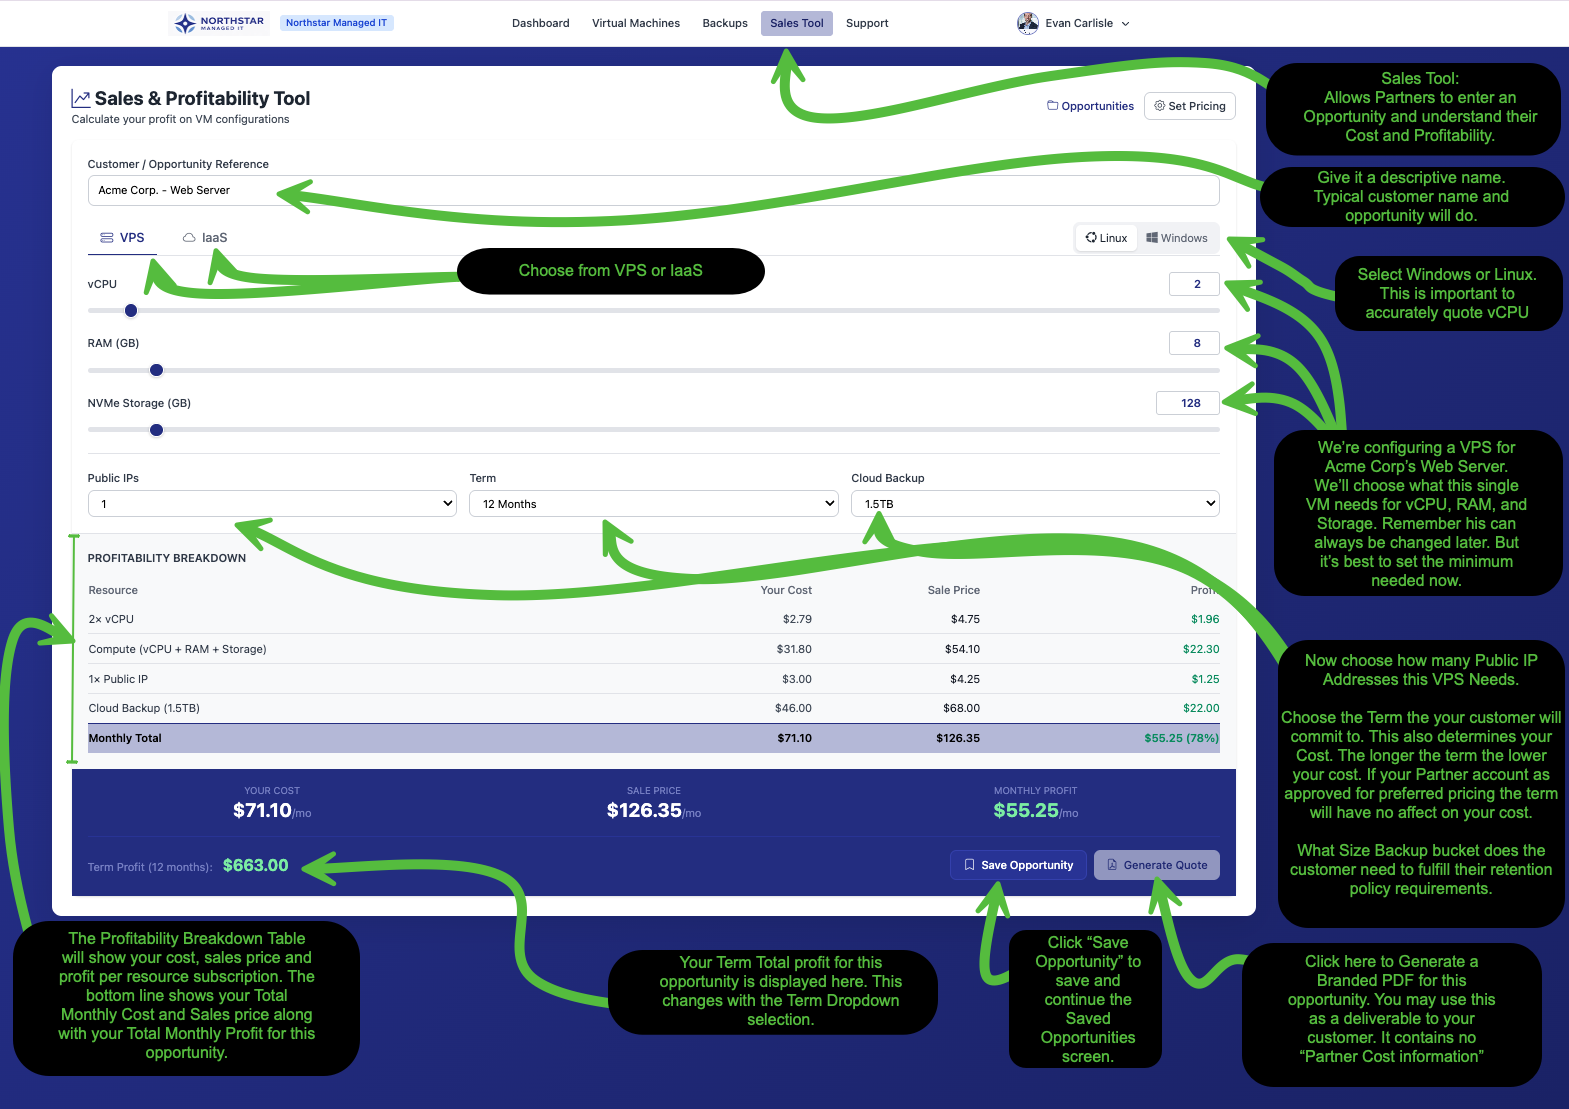
Save or Generate a Quote
When you're happy with the configuration, you have two options:
- Save Opportunity Saves this opportunity to your pipeline so you can come back to it later
- Generate Quote Creates a branded PDF quote you can share with your customer as a deliverable
Managing Your Opportunities
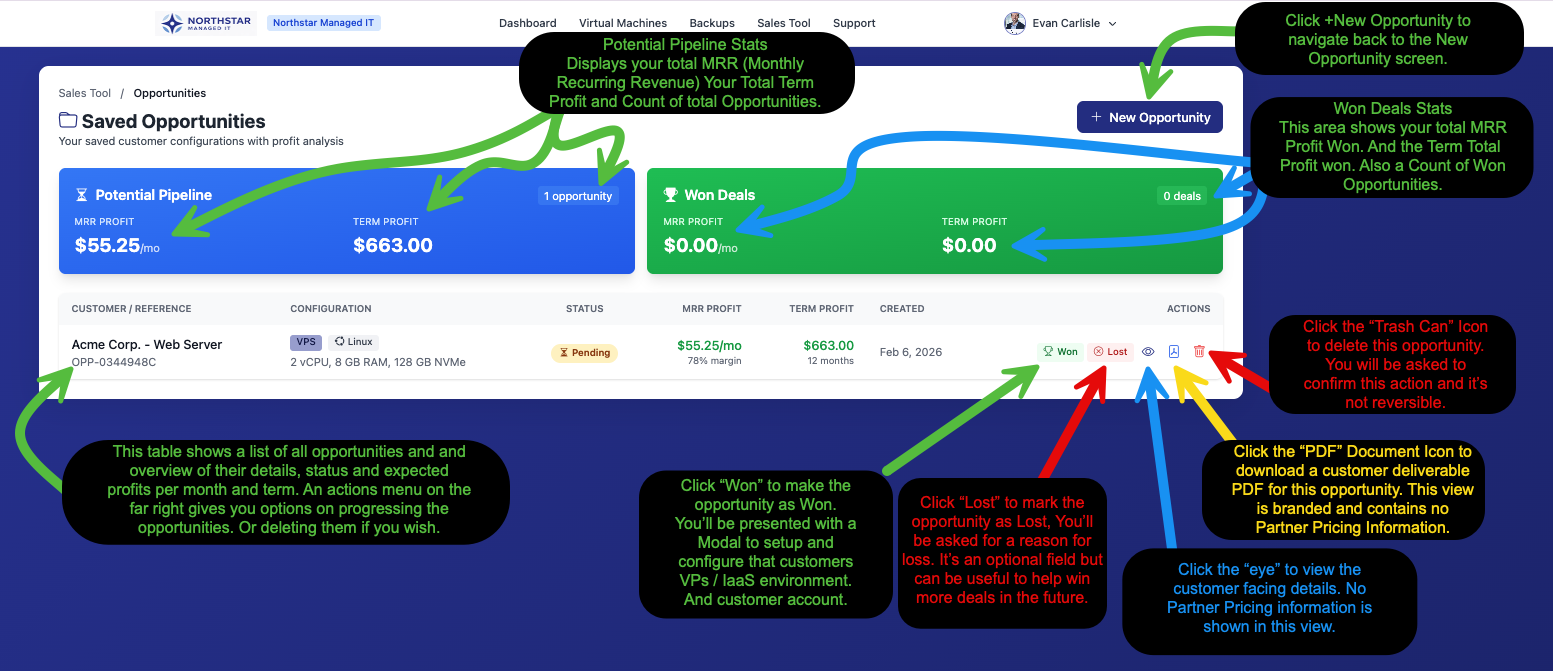
Click Opportunities at the top of the Sales Tool (or save an opportunity) to view your Saved Opportunities dashboard. This is your sales pipeline at a glance.
Pipeline Overview
Two summary cards sit at the top of the page:
- Potential Pipeline Shows the count of open opportunities, your total MRR (Monthly Recurring Revenue) profit, and total term profit for all pending deals
- Won Deals Shows the count of closed-won deals, your realized MRR profit, and total term profit from deals you've already converted
Opportunity Table
Below the summary cards, you'll find a table listing every opportunity with its customer reference, configuration details, status, MRR profit, term profit, and creation date.
On the right side of each row, the Actions column gives you quick access to manage the deal:
| Action | Description |
| Won | Close the deal and provision the customer account and VM |
| Lost | Mark the opportunity as lost with an optional reason |
| View (eye icon) | Preview the customer-facing quote with no partner pricing visible |
| PDF (document icon) | Download a branded PDF quote to share with your customer |
| Delete (trash icon) | Permanently delete the opportunity |
To create a new opportunity, click the + New Opportunity button in the top right corner.
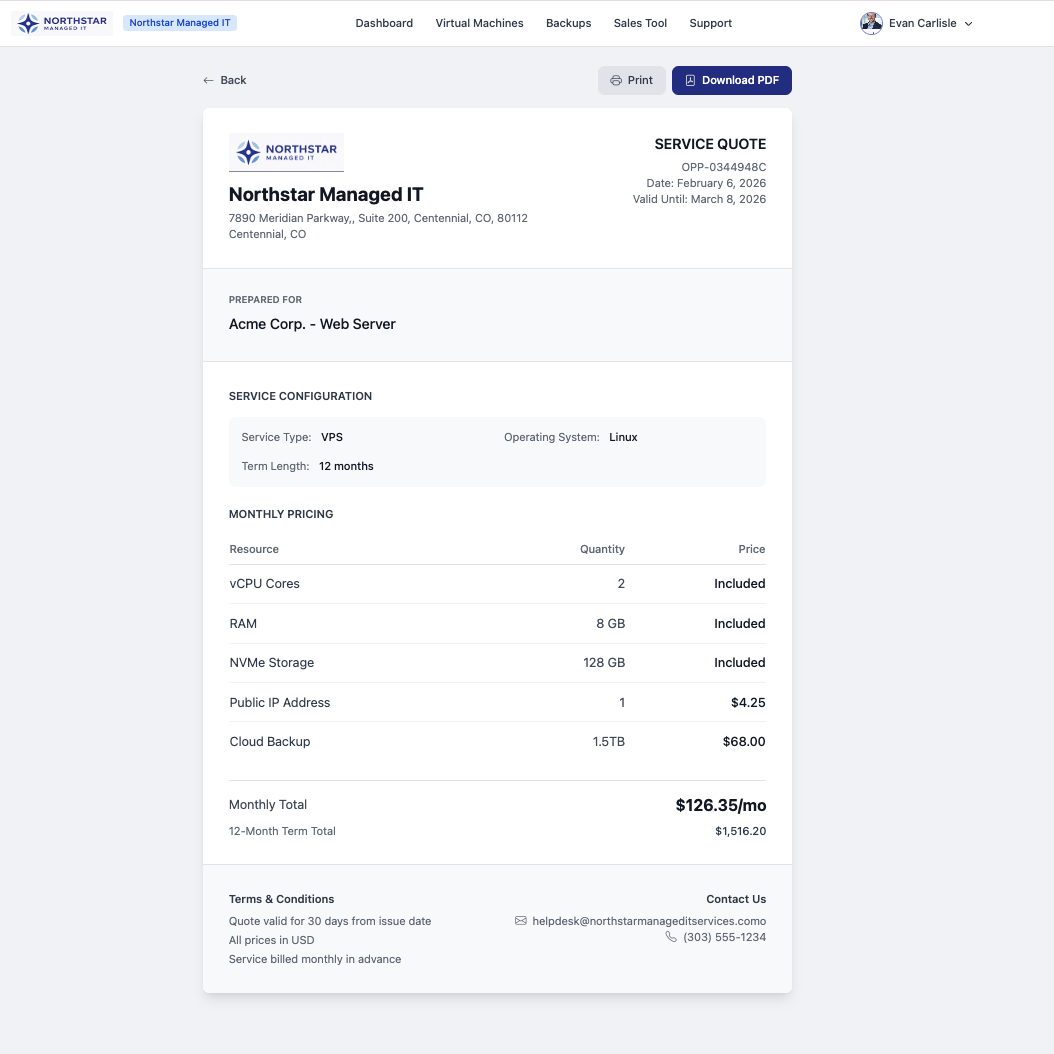
Viewing an Opportunity
Click the eye icon on any opportunity to open the customer-facing quote view. This shows the service configuration and monthly pricing exactly as your customer would see it.
From this view you can Print the quote or click Download PDF to save it as a file.
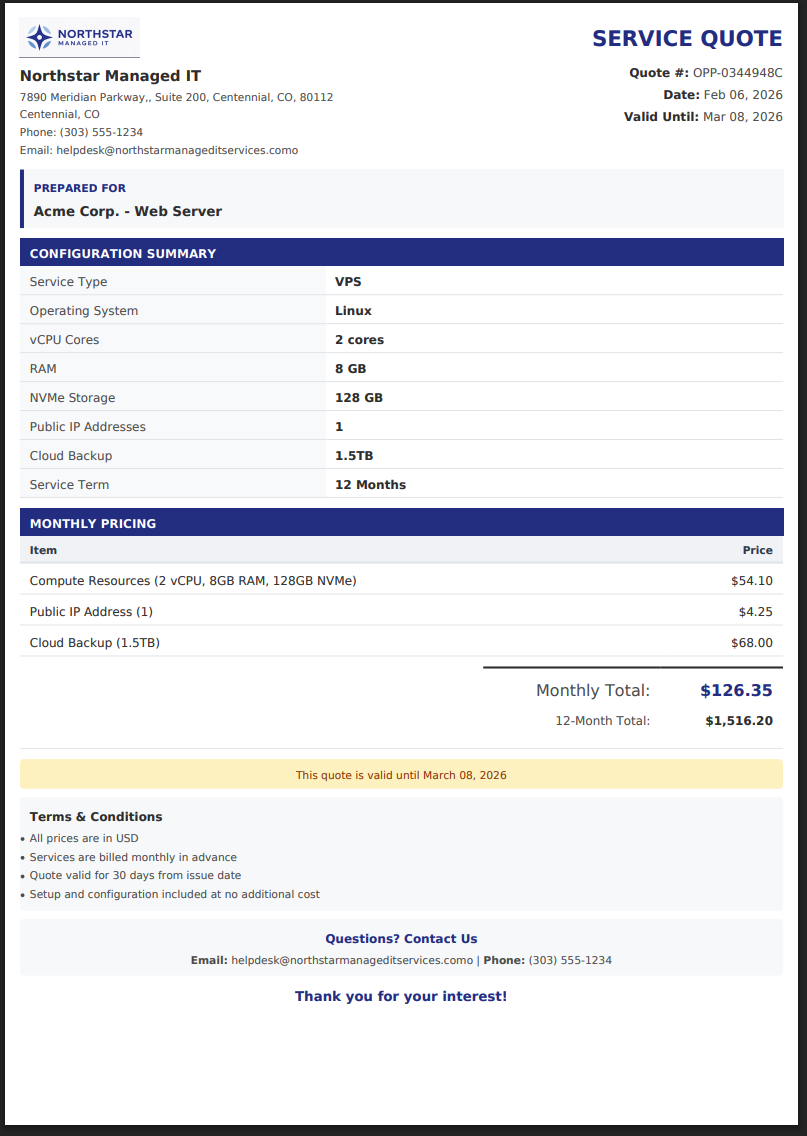
Downloading the Quote PDF
Click the PDF icon from the opportunity table (or Download PDF from the quote view) to generate a branded quote document. This PDF is designed to be a professional deliverable you can email or present to your customer.
The PDF includes:
- Your company branding, name, and contact details
- The customer's opportunity reference
- A full configuration summary (service type, OS, vCPU, RAM, storage, IPs, backup, term)
- Monthly pricing breakdown with a term total
- Terms and conditions with a quote validity date
Closing a Deal as Won
When your customer is ready to move forward, click the Won button on the opportunity. This launches a guided wizard that creates the customer account and provisions their virtual machine in four steps.
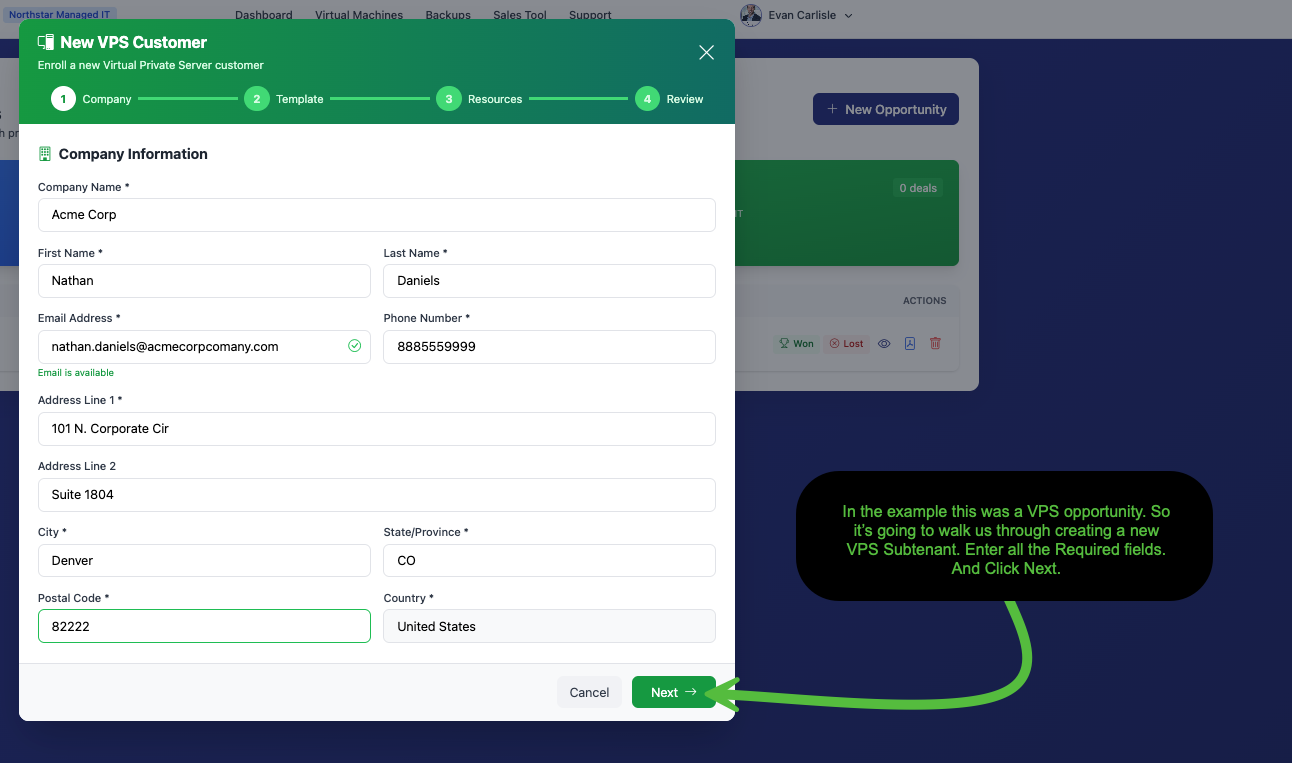
Step 1: Company Information
Enter your new customer's details. All fields marked with an asterisk (*) are required:
- Company Name
- First Name and Last Name of the primary contact
- Email Address (validated in real time to ensure it's available)
- Phone Number
- Address (street, city, state, postal code, country)
Once all required fields are filled in, click Next to continue.
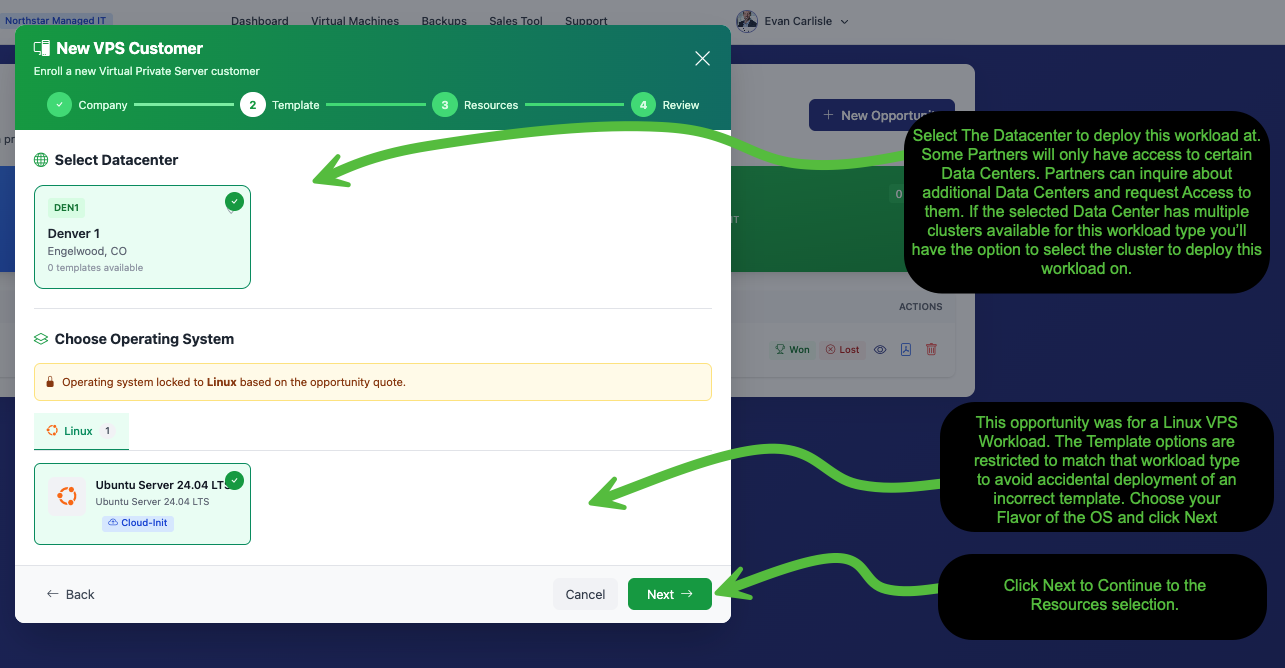
Step 2: Select Datacenter & Template
Choose where to deploy the virtual machine and which operating system template to use.
- Select Datacenter Pick the datacenter location for this workload. Your available datacenters depend on your partner agreement. If a datacenter has multiple clusters, you'll also select the cluster
- Choose Operating System The OS type is locked to match the opportunity quote (Linux or Windows), preventing accidental deployment of the wrong template. Select the specific OS flavor you want, such as Ubuntu Server 24.04 LTS
Click Next to continue to resource configuration.
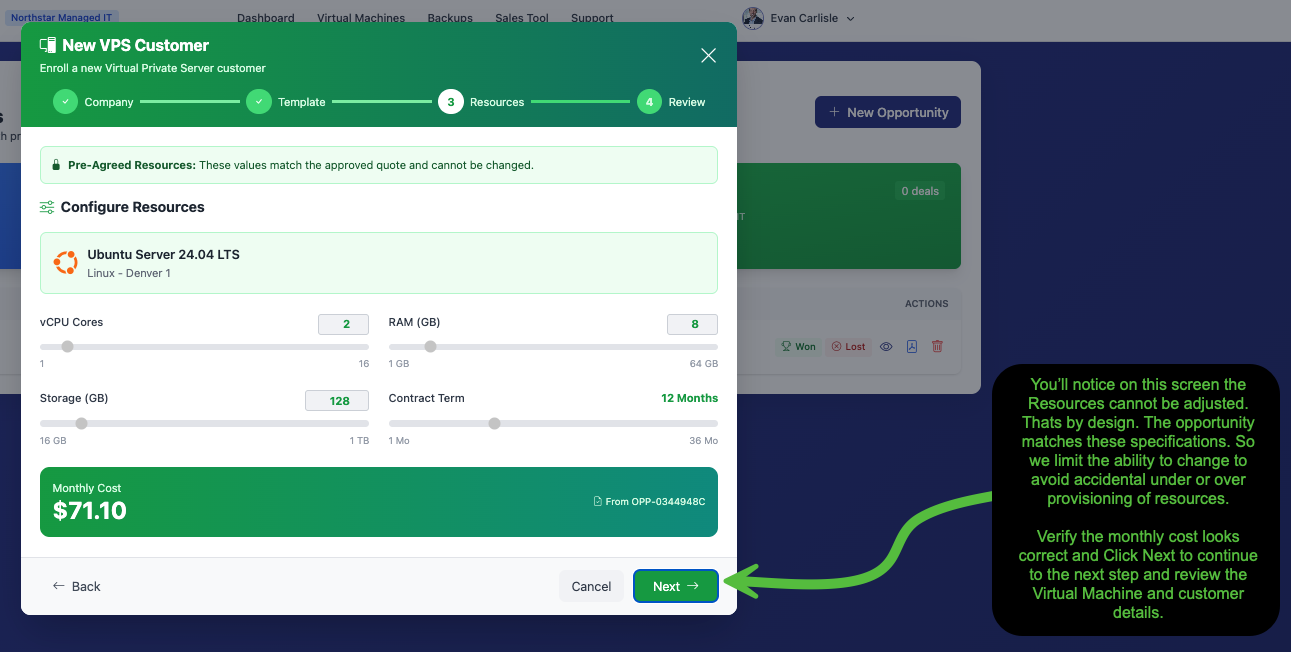
Step 3: Configure Resources
This step shows the VM resource allocation: vCPU cores, RAM, storage, and contract term. You'll notice the resource sliders cannot be adjusted.
Verify the monthly cost looks correct, then click Next to proceed to the final review.
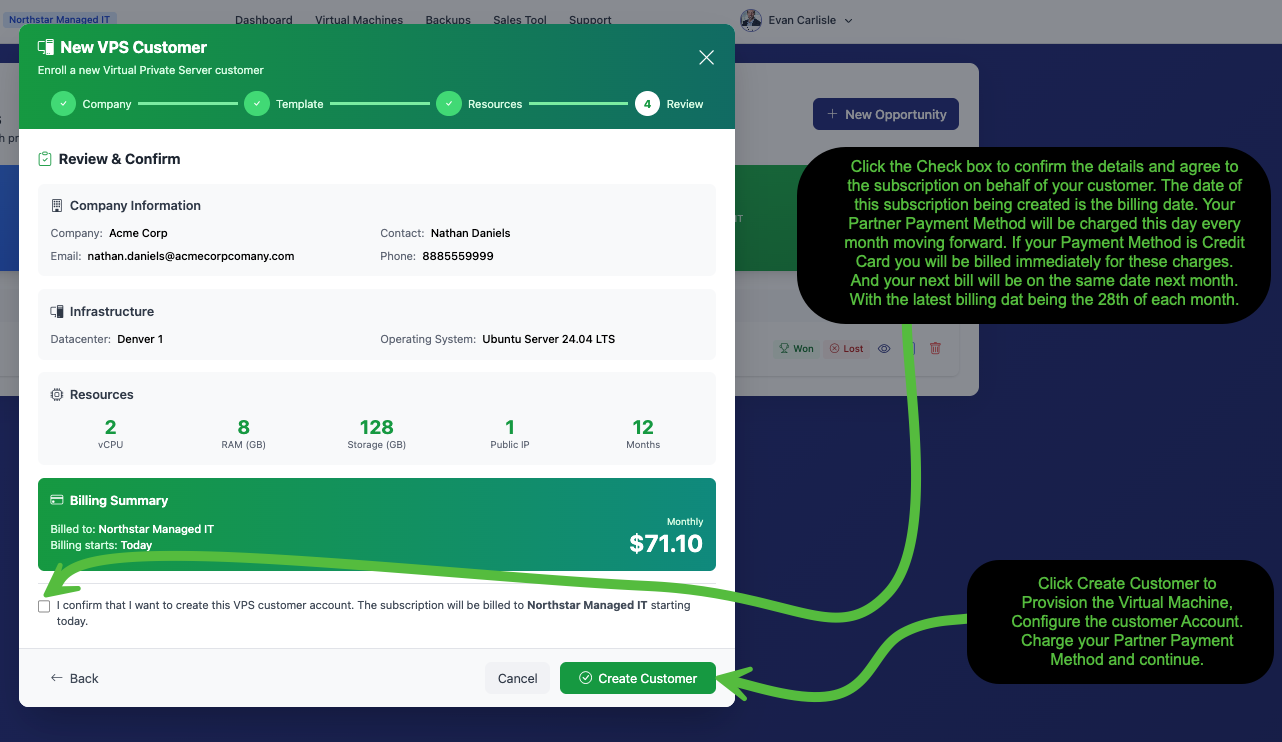
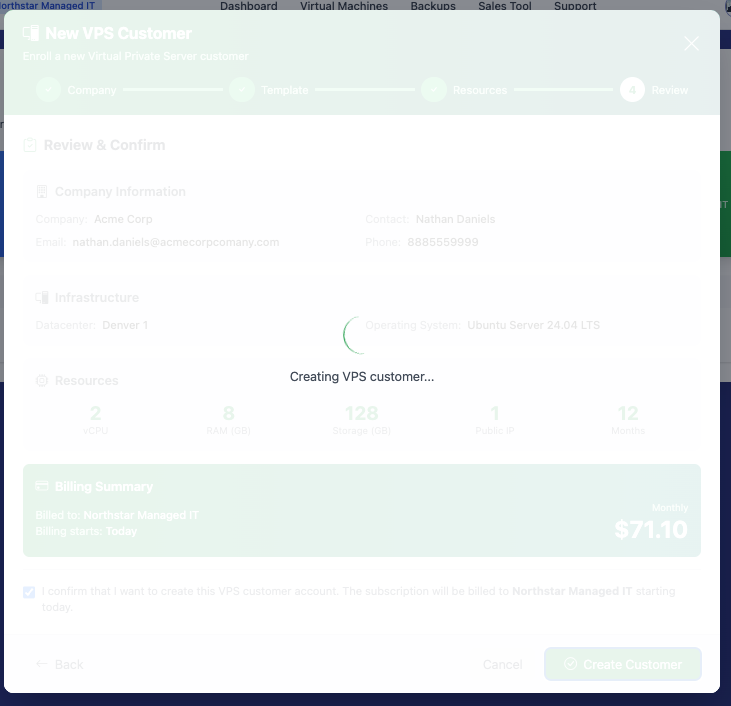
Step 4: Review & Confirm
The final step summarizes everything before provisioning begins:
- Company Information confirms the customer name, contact, email, and phone
- Infrastructure shows the selected datacenter and operating system
- Resources displays vCPU, RAM, storage, public IPs, and term at a glance
- Billing Summary shows who will be billed (your partner account), the billing start date, and the monthly cost
Check the confirmation box to agree, then click Create Customer to begin provisioning.
Provisioning
After clicking Create Customer, Cloud Command takes over. You'll see a loading indicator while the system creates the customer account, provisions the virtual machine, and configures all associated resources. This typically takes just a few moments.
Once provisioning is complete, the opportunity status updates to Won and the customer will appear in your sub-tenant list with their new virtual machine ready to go.
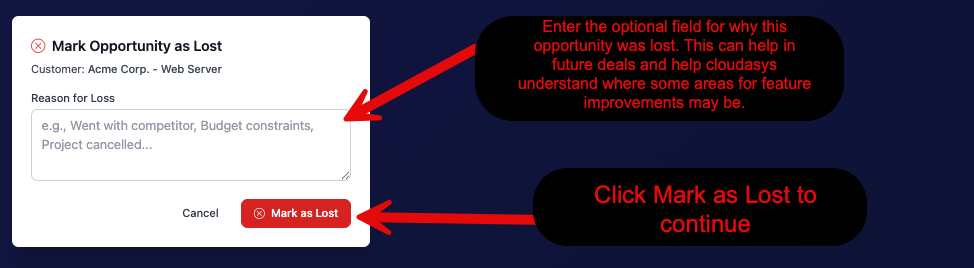
Marking an Opportunity as Lost
If a deal doesn't work out, click the Lost button on the opportunity row. A dialog will appear asking for an optional Reason for Loss.
While the reason is optional, filling it in can be valuable. It helps you spot patterns across lost deals and gives Cloudasys insight into areas where improvements can be made.
Click Mark as Lost to confirm. The opportunity will be updated to reflect its lost status.
Deleting an Opportunity
To remove an opportunity entirely, click the trash icon in the actions column. A confirmation dialog will appear.
Click Delete to confirm removal.

Need Help?
If you have questions about the Sales Tool, quoting, or provisioning new customers, please submit a support ticket and our team will be happy to assist you.